
Test cases
Test cases are the core building blocks of the grading process. Each test case includes two elements: an input and an expected output (answer).
When a user submits a solution, the system runs the program for each test case, feeding it the provided input and capturing the output. This output is then compared to the expected answer. If they match, the test is considered passed, and the participant is awarded points.
How to Create a Test
To create a new test, follow these steps:
Open the console and select the space where your problem is hosted.
Navigate to the Problems section in the left-hand menu.
Select the problem you want to modify.
Go to the Testing section in the problem menu.
Choose the testset where you want to add the test.
Click Add test to create a new test case.
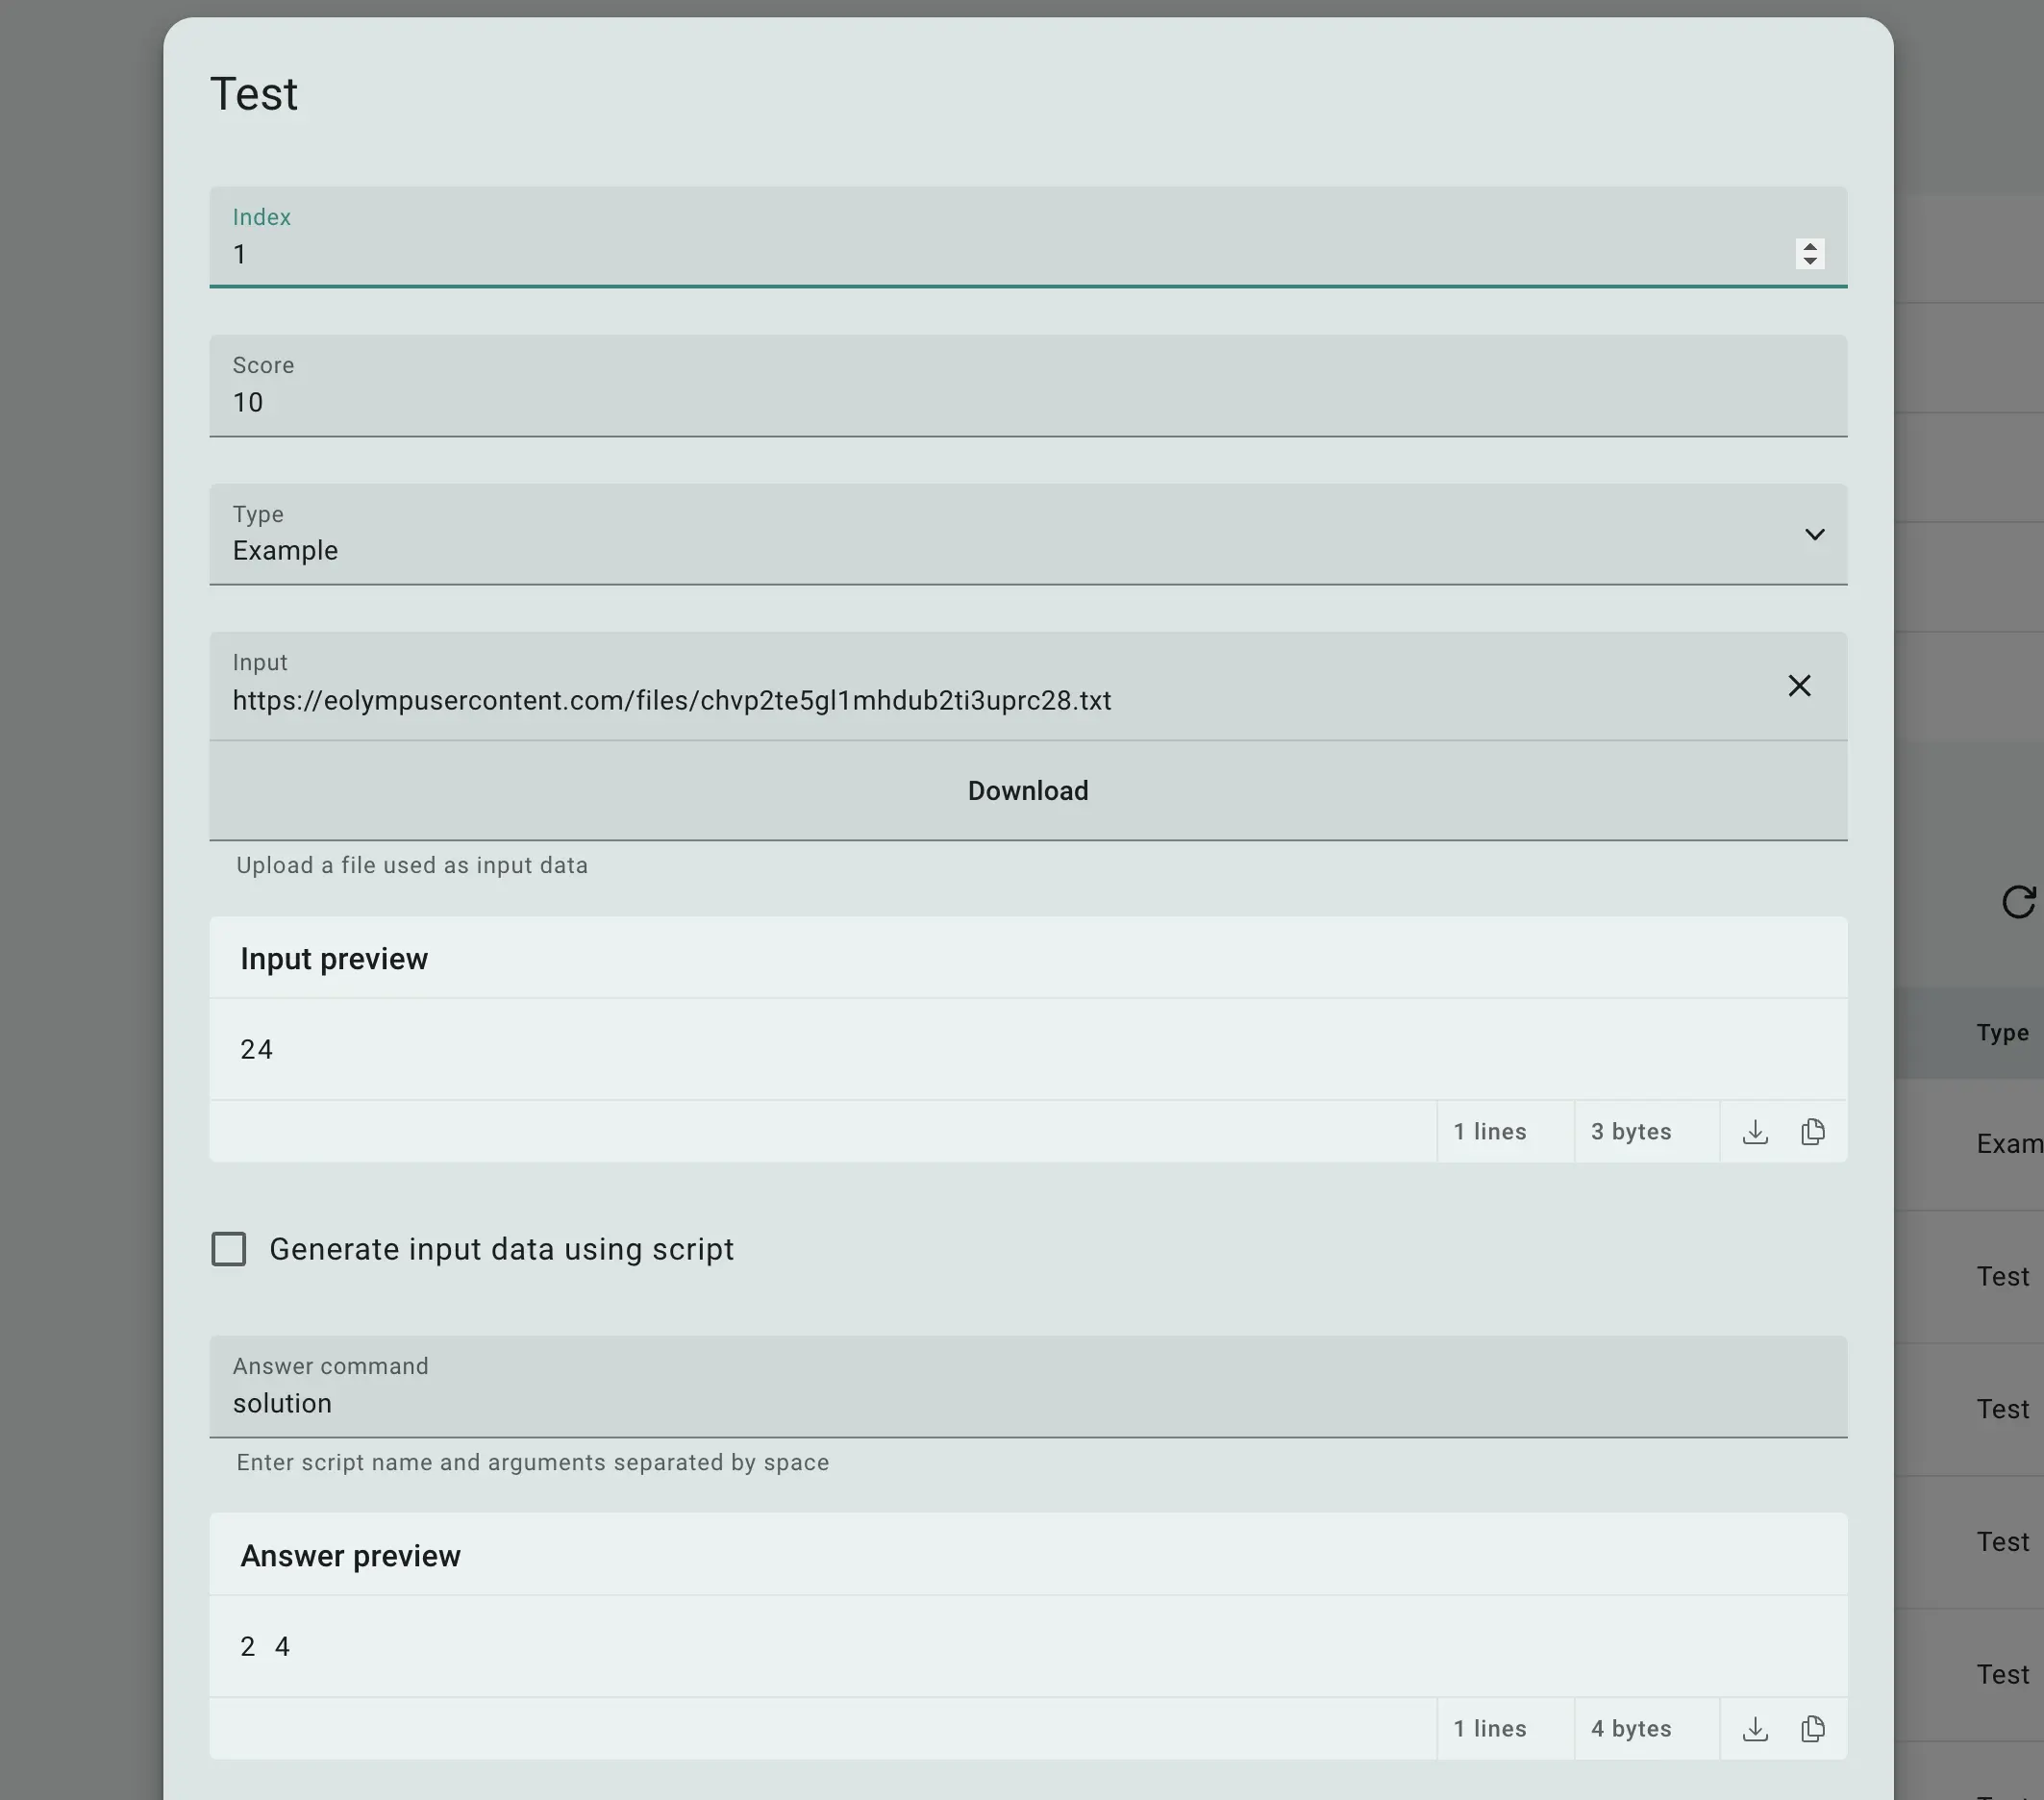
Fig 1. Test creation form
When configuring a test case, you can define the following parameters:
Index: The number assigned to the test case.
Score: The number of points awarded if the test is passed. The total score depends on the scoring mode of the associated testset.
Type: Specifies if the test is an example or a regular test. Example tests are automatically displayed in the problem statement.
Input: The file containing the input data.
Answer: The file containing the expected output (answer).
You can either upload the input and answer files or generate them automatically by selecting "Generate data using script."
Additionally, for example tests, you can override the input and output shown in the statement by filling in the "Example Input" and "Example Answer" fields. This is particularly useful for interactive problems, where the input and answer files might contain instructions for the interactor rather than the actual input and output data.
 Stand with Ukraine