
Groups
Groups offer a simple and effective way to organize your members. Organizing members into groups makes it easy to filter participants for contests, manage students in courses, and quickly add participants to contests or courses.
Each member can belong to up to 5 groups, and each group can include a maximum of 100 members.
How to Create a Group
Setting up groups is straightforward and takes just a few steps:
Open the console and select your space.
Navigate to the Groups section and click "Create a group".
Choose a name for your group and click "Create".
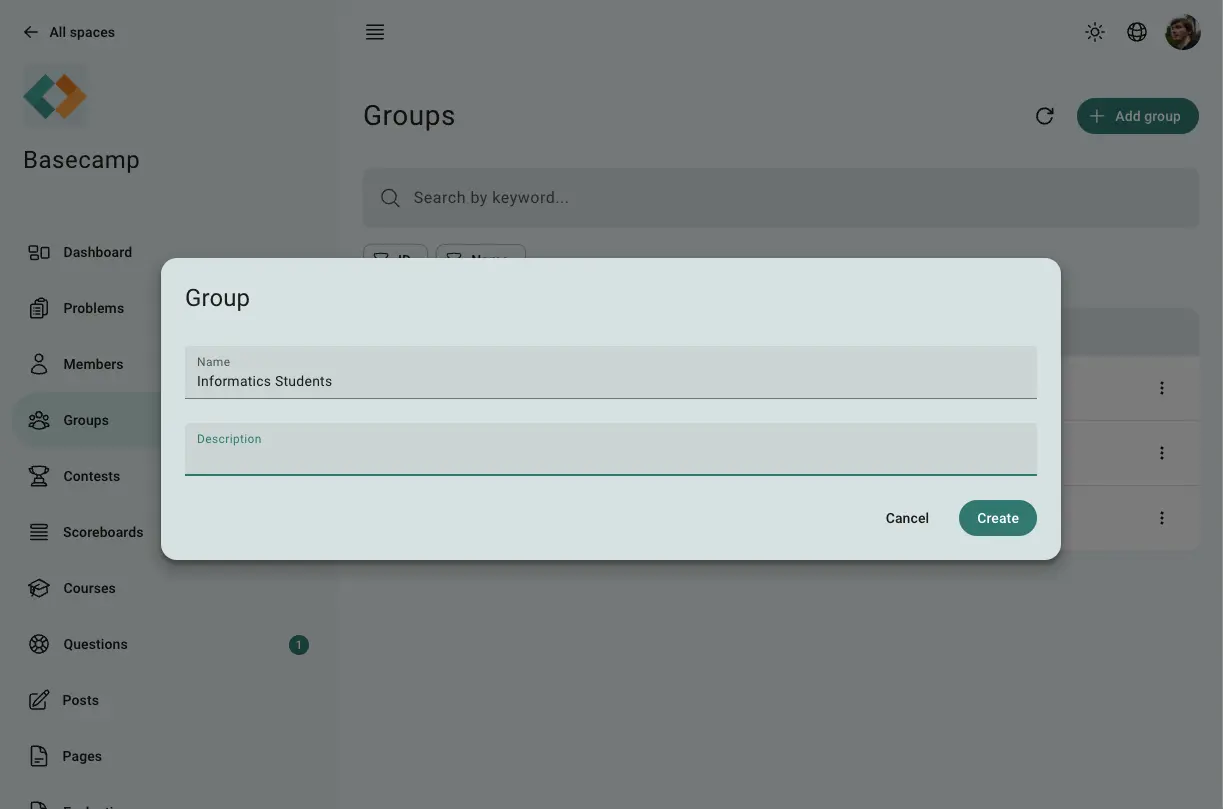
Fig 1. Form to create a group
Once your group is created, you can begin adding members to it. Go to the "Members" section, find the member you want to add, access their profile, and assign the group in the "Groups" field.
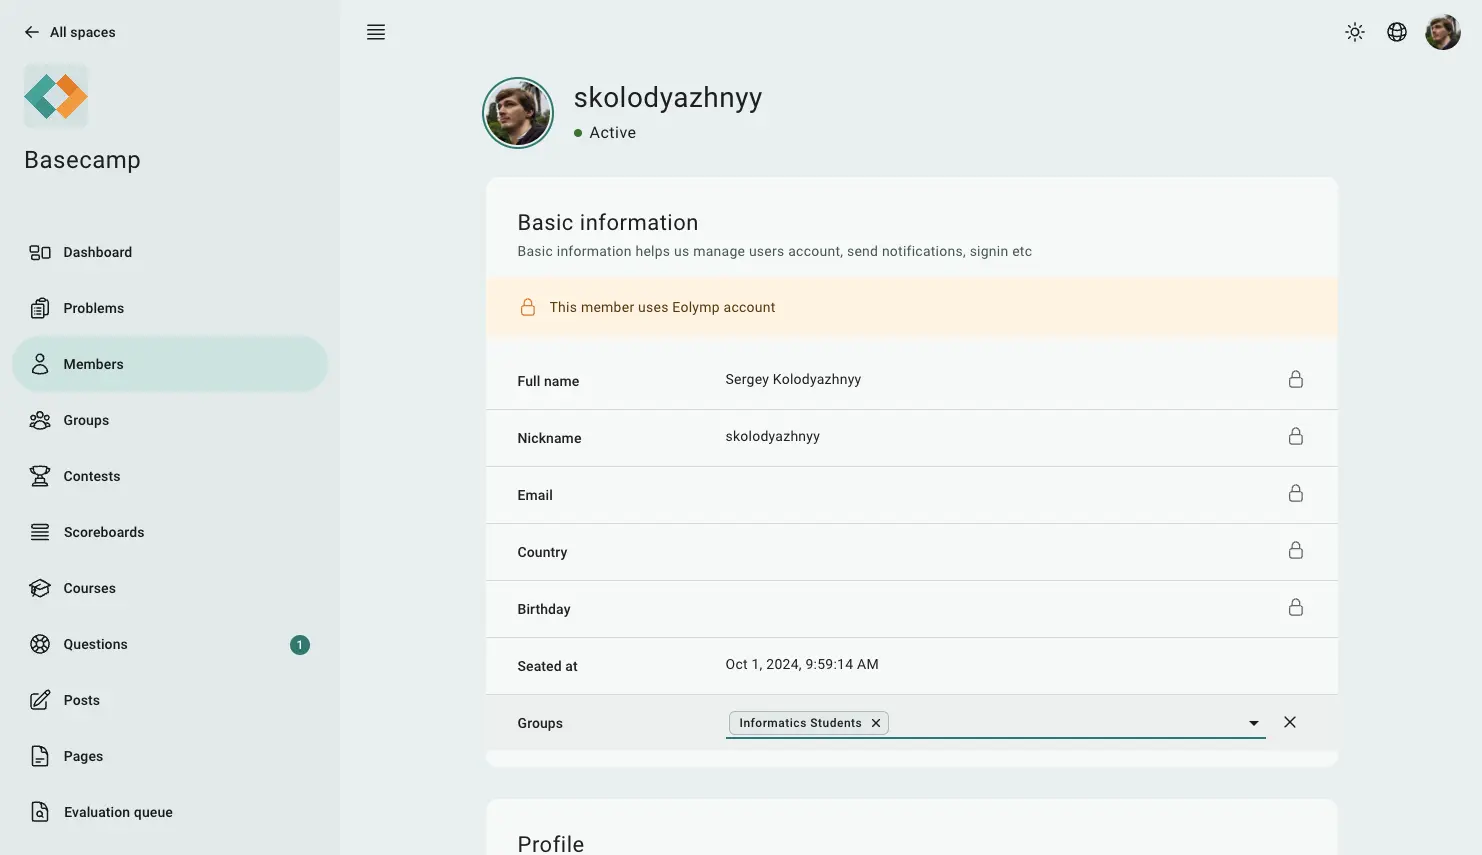
Fig 2. Adding a student to a group.
Adding Groups to a Contest
After adding members to a group, you can easily include the entire group in a contest. Here's how:
Go to the Contests section and select the contest you want.
Enter the "Participants" section.
Click on the right side of the "Add participant" button to reveal more options.
Select "Add group" and choose the group you'd like to add.
You can decide whether to add members officially or unofficially by toggling the option in the form.
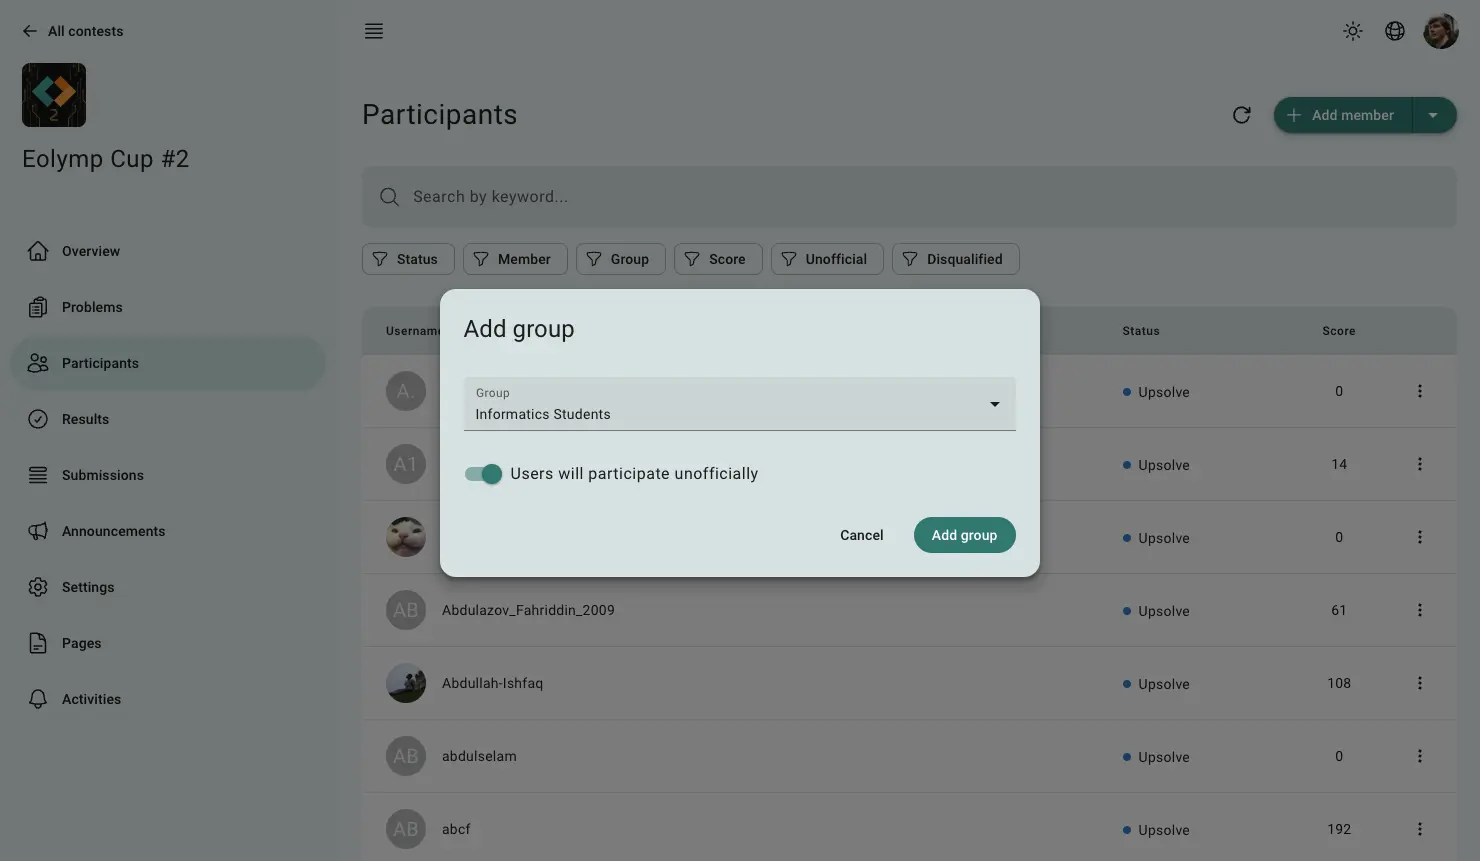
Fig 3. Adding a group to a contest
Although you add the group as a whole, the participants are still listed individually in the contest. This means any changes made to the group membership after adding it to the contest won't be reflected automatically. If you add new members to the group, they won’t be added to the contest, and removing members from the group won’t remove them from the contest.
You can use the "Group" filter in the "Participants" section to easily find all contest participants who belong to a particular group. Keep in mind that this filter reflects the current group assignments, not the group status at the time the participants were added.
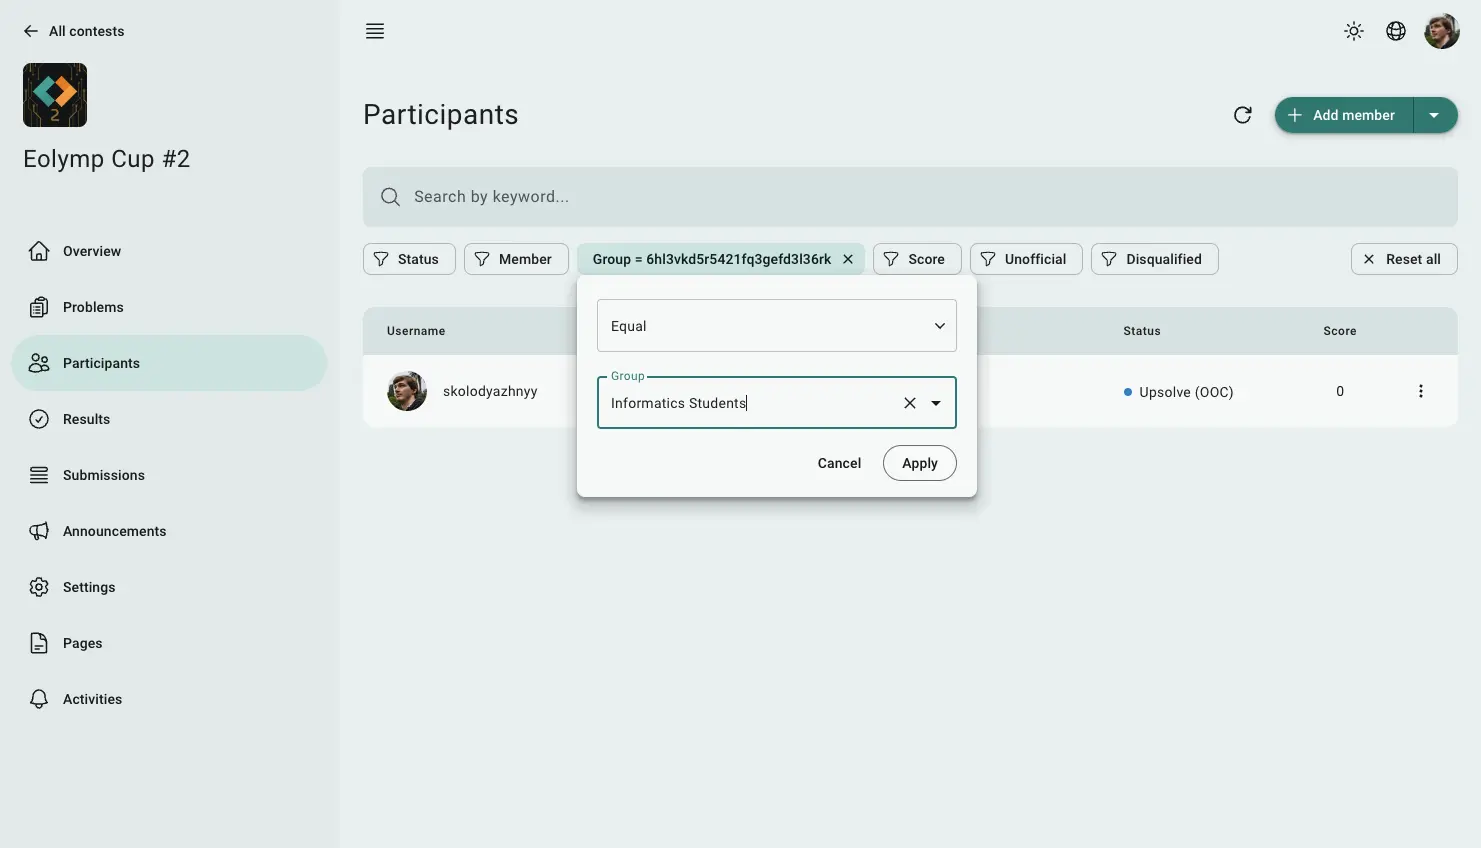
Fig 4. Using the group filter in the participant list
Adding Groups to a Course
Groups can also be a powerful tool for managing course students. To add a group to a course, follow these steps:
Go to the Courses section and choose the course you want.
Navigate to the Groups section within the course.
Click "Add group" and enter the group name.
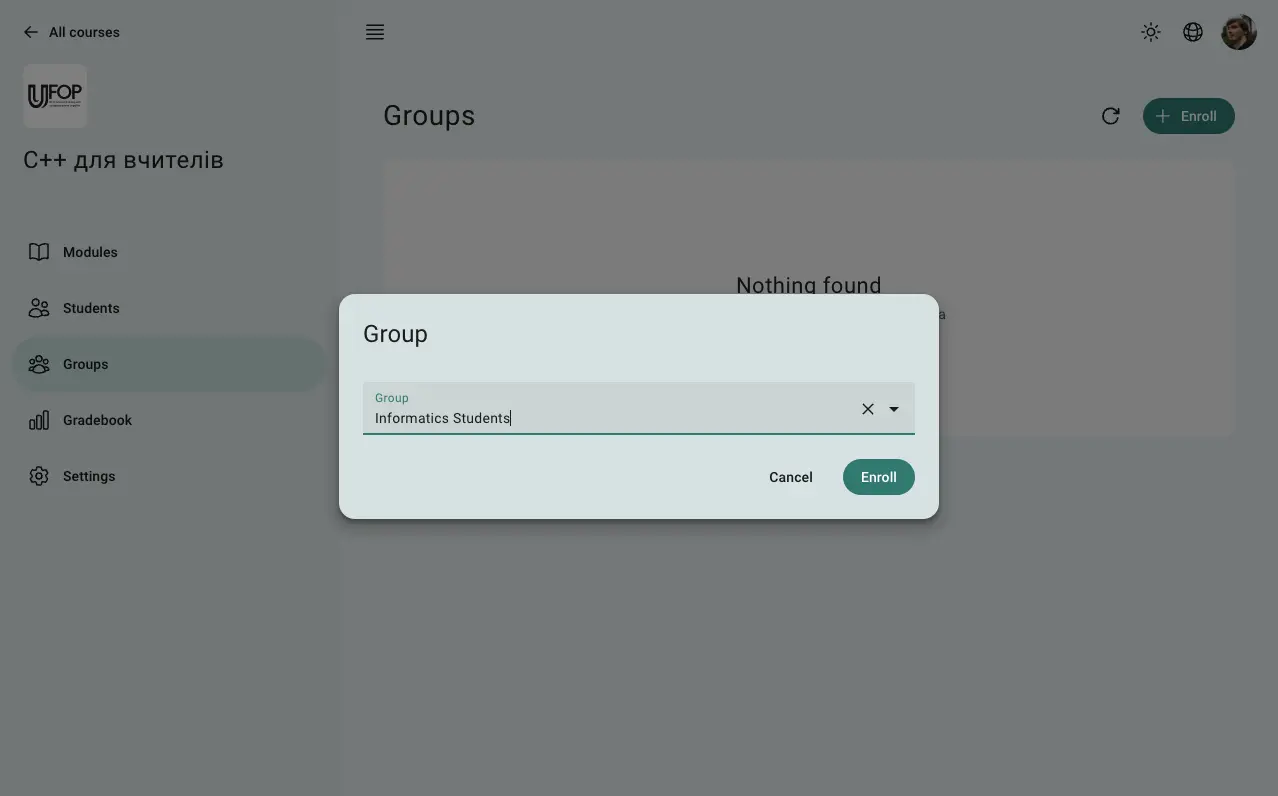
Fig 5. Adding a group to a course
When a group is added to a course, a student record is automatically created for each group member. This record tracks their progress throughout the course.
One advantage of using groups in courses is that the membership stays synchronized. If you add someone to a group, they will be added to the course automatically. However, if a member is removed from the group, their student record remains in the course. While their grades and progress will still be visible, the group’s assignments will no longer apply to that student.
You can also configure group-specific assignments that will be applied to all members of the group in the course.
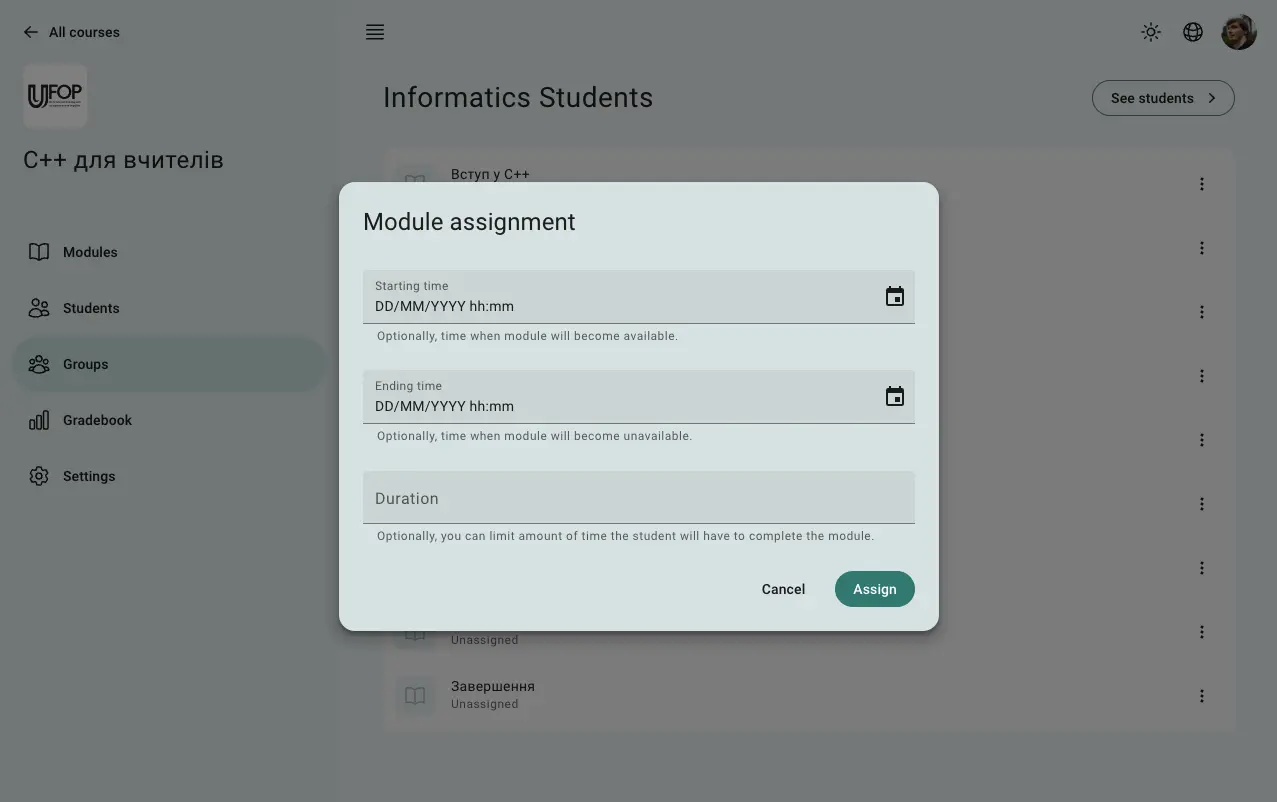
Fig 6. Configuring group assignments
Lastly, you can filter students by group using the "Group" filter in both the student list and the Gradebook, making it easy to manage and review the progress of specific groups.
 Stand with Ukraine