
Courses
Courses allow you to create a virtual classroom focused on a specific subject. Each course is made up of modules, and each module includes educational materials, explanations, and practice problems. For example, in a course called "Python 101," you might have modules on basic syntax, functions, and built-in libraries. These modules would include explanations, tutorials, and interactive exercises. It's a good idea to keep modules short so students can complete them in one sitting.
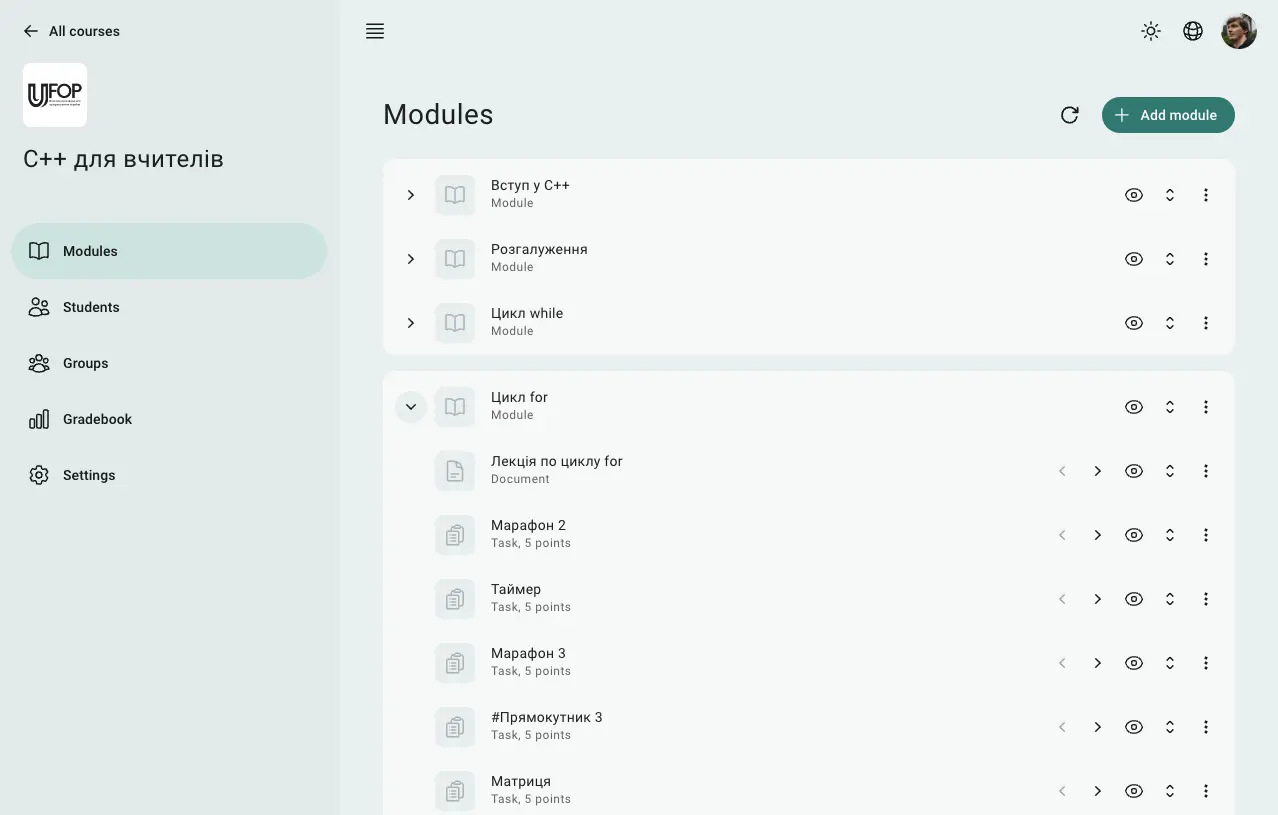
Fig 1. Course with multiple modules
Unlike contests, which are competitive, courses are designed for students to learn at their own pace, focusing on new concepts and skills.
You can also combine courses with contests to make learning more engaging and fun. Adding a bit of competition can help motivate students.
How to Create a Course
To create a course, follow these steps:
Open the console and select the space where you want to create the course.
Go to the "Courses" section in the left menu.
Click "Create course," then fill out and submit the course form.
In the form, you’ll need to provide:
The course name, description, image, and language, which help students identify the course.
The visibility settings, which determine whether the course will be shown on the space's website.
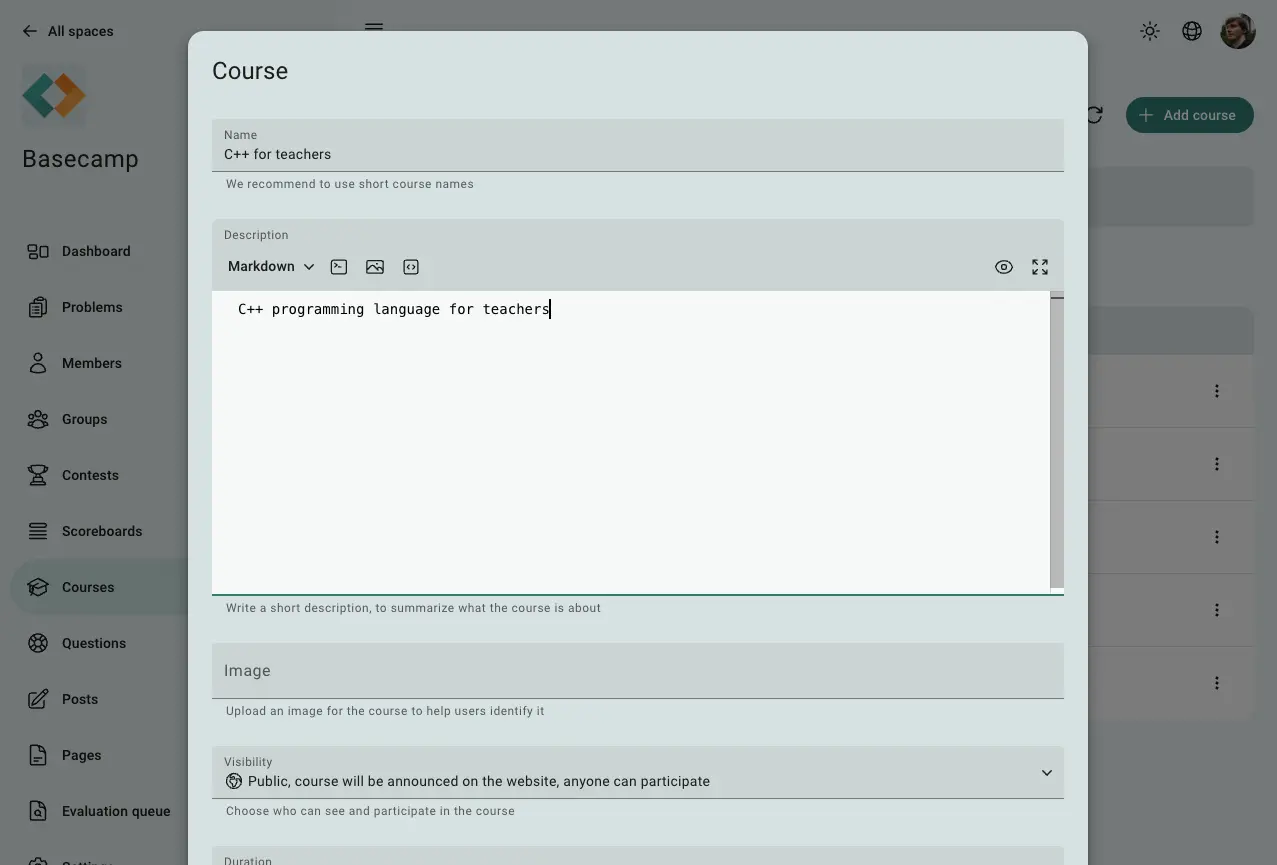
Fig 2. Course creation form
Once your course is created, you can:
Create modules to add educational content.
Set assignments if your course requires moderation.
Visibility Settings
Visibility controls who can see and join the course on the space's website:
Public: The course is visible to everyone. Users can join and participate freely.
Unlisted: The course is not shown in the list, but users can still participate if they have the direct course link.
Private: The course is hidden, and only users you add directly can participate.
If you want students to access the course on their own at any time, set the visibility to "Public" or "Unlisted." In this mode, students can join the course whenever they like, without needing assignments.
If you prefer to control when students can join, set the visibility to "Private" and use assignments to decide who can access the course and when.
Assignments
Assignments let you control which modules students can access. You can assign all modules to a student at once by using the "Assign all modules" toggle, giving them full access at any time.
For more control, you can assign modules individually and set specific conditions for each assignment, you can choose and combine these conditions:
If you set a "start after" time, the module will be marked as "Scheduled" and unavailable until that time.
If you set a "complete before" time, the module will be available only until the specified time and then marked as "Complete."
If you set a "duration," the module will be marked as "Ready". Once the student starts, a countdown begins, limiting how long they have to complete it. After the time runs out, the module will be marked as "Complete".
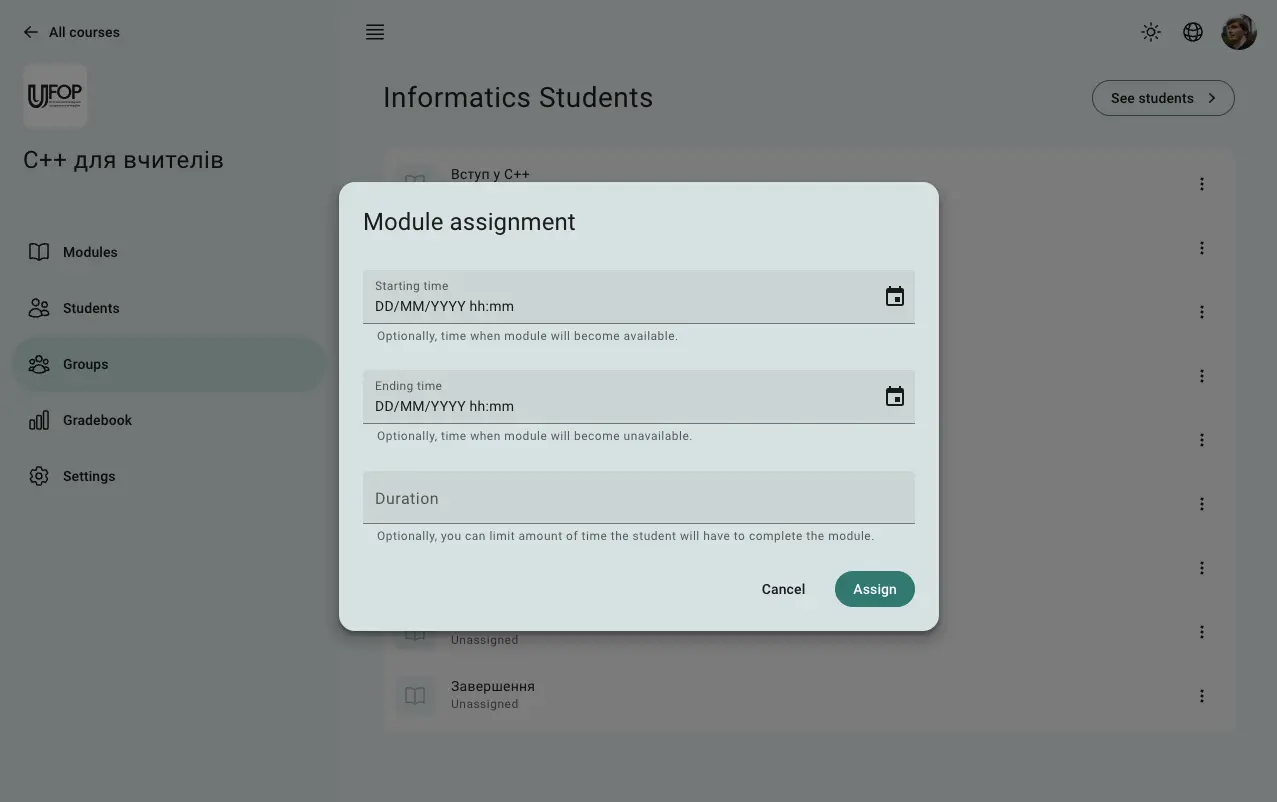
Fig 3. Module assignment form
You can assign modules directly to an individual student or use groups to manage multiple students at once. Group assignments will apply to everyone in the group. However, if a student has individual assignments, those will take priority over group assignments on a module-by-module basis. If a student is part of several groups, the first assignment made will be the one used.
Grading
Each module in the course is graded separately based on the tasks within it. Every task has a score and a grading coefficient. The score determines how the task’s total is displayed, while the grading coefficient determines how much the task affects the overall module grade.
The module grade is calculated on a scale of 0 to 100, as a weighted average of all tasks. This is done by multiplying each task’s completion percentage by its grading coefficient, then summing those values and dividing by the total of all the grading coefficients in the module.
Gradebook
The gradebook provides an overview of a student’s grades across all modules in the course.
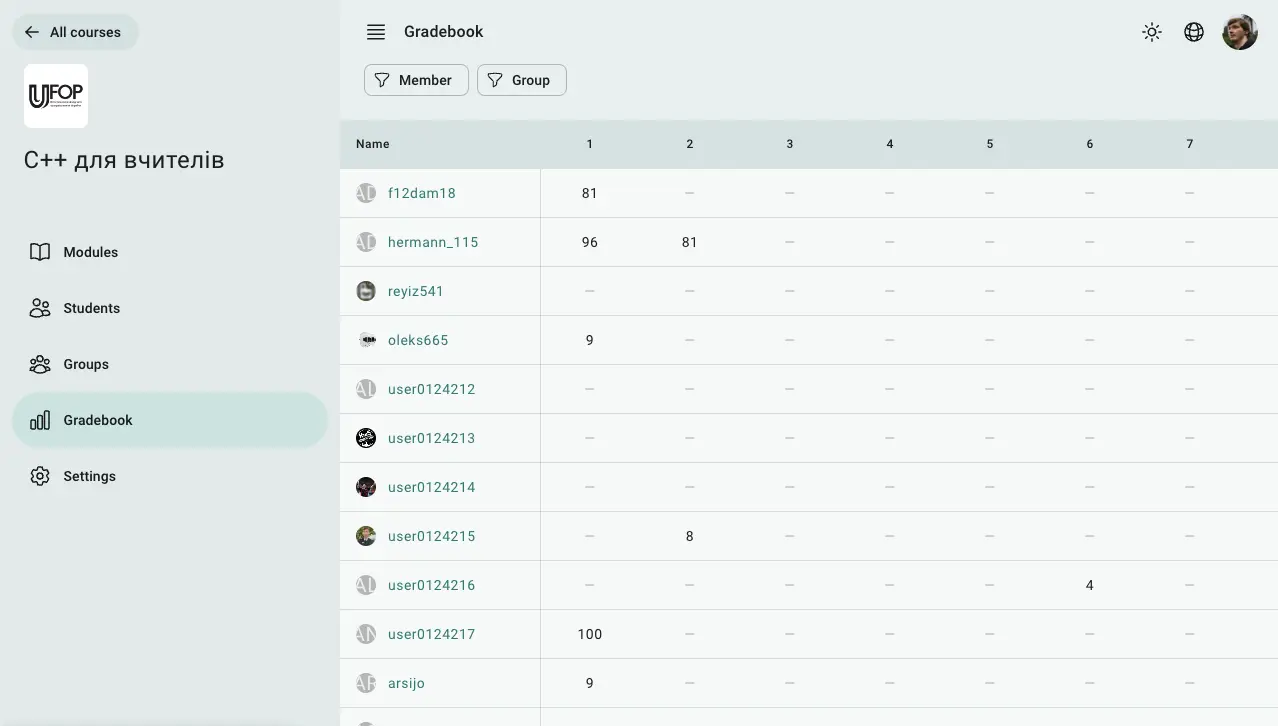
Fig 4. Gradebook
 Stand with Ukraine