
Assignments
Assignments let you control if and when a specific module in a course is available to a student, and you can add extra conditions such as a time window for access or a time limit to complete the module. Assignments can be made for individual students or for entire groups. Group assignments apply to all members of the group unless an individual assignment has been made for a specific student, which takes priority.
You can also enable the "Assign all modules" option for a student, granting them unrestricted access to all modules at any time, bypassing individual or group assignments.
How to create an assignment
To create an assignment for a student or group, follow these steps:
Open the console and select your space.
Go to the Courses section and choose the course where you want to manage assignments.
In the left menu, open the Students or Groups section.
Find the student or group you want to assign modules to, and view their current assignments.
Click the "..." next to the module you wish to assign and choose "Assign."
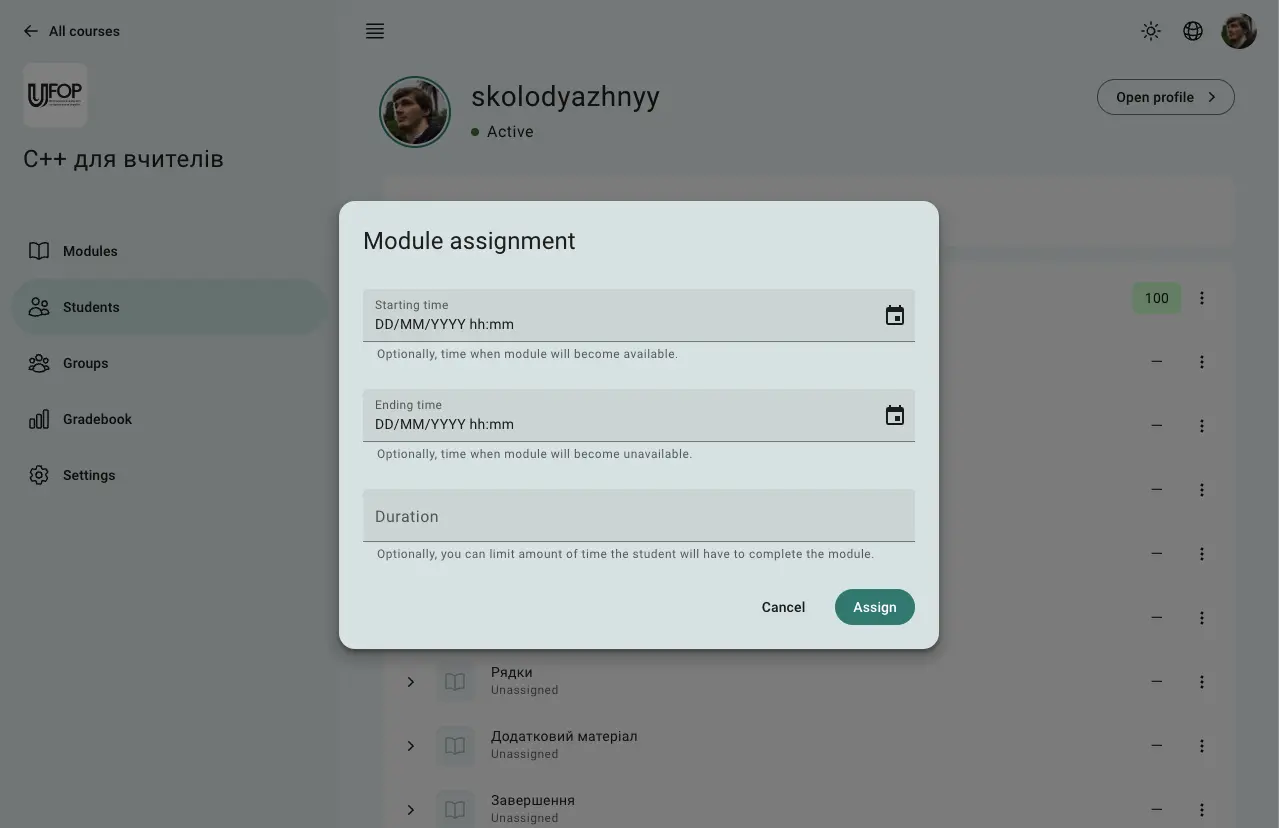
Fig 1. Module assignment form
Setting assignment conditions
In the assignment form, you can specify additional conditions for when and how the module is available to the student or group. These conditions allow for flexible control over access and time limits. The available options include:
Start time: The date and time when the user will be able to start the module. Before this time, the module will be marked as "Scheduled" and inaccessible to the user.
End time: The deadline by which the user must complete the module. After this time, the module will be marked as "Complete" and no longer available.
Duration: The amount of time (in seconds) the user will have to complete the module once they begin. The module will appear as "Ready," and the student must click "Start" to begin the countdown. When the time runs out, the module will be marked as "Complete."
These conditions provide flexibility to control when students can access the module and how long they have to complete it.
"Assign all modules" option
If you want to give a student complete access to all modules without managing individual assignments, you can toggle the "Assign all modules" option. This grants the student unrestricted access to all course modules, ignoring any group or individual assignments.
This feature is particularly useful if you want certain students to work through the entire course at their own pace without being limited by any time restrictions or conditions set for other students.
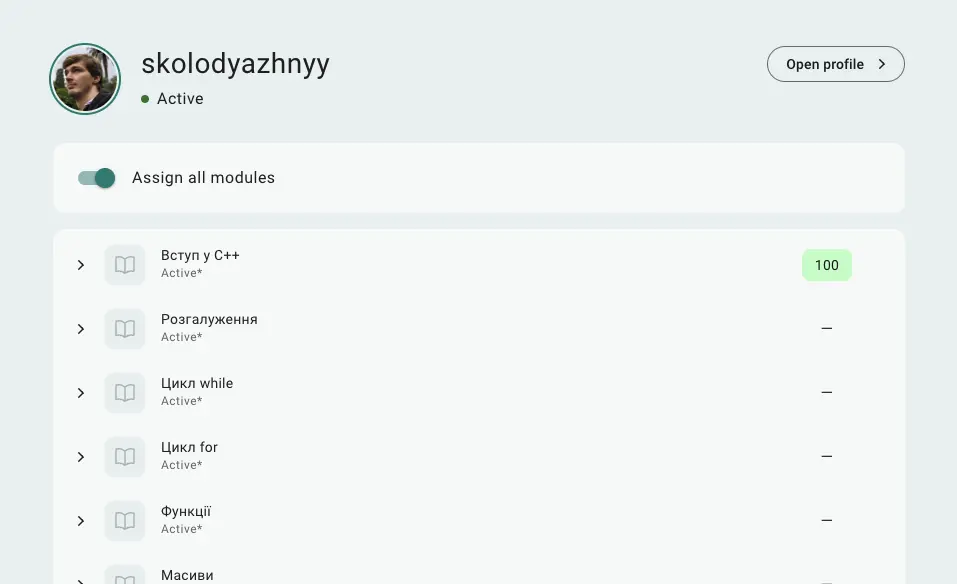
Fig 2. Assign all modules toggle
Practical Examples
Here are a few practical ways to use assignments:
Self-paced learning: Enable "Assign all modules" for students who are ready to move through the course content at their own pace, giving them immediate access to everything.
Scheduled content: Use the start time to schedule when each module becomes available to students, allowing them to progress step-by-step. For example, you could release new modules weekly by setting a different start time for each module.
Timed assessments: Set an end time or duration for certain modules that serve as assessments. This way, students must complete these modules within a set time frame to test their understanding under time pressure.
Mixed strategy: For more controlled courses, you could combine start times, end times, and duration. For instance, you might give students a 24-hour window to access a module but limit them to 60 minutes to complete it once they start.
By carefully planning assignments and combining conditions, you can create a structured yet flexible learning experience that caters to different student needs.
 Stand with Ukraine